top of page


BACK TO THE FUTURE 2 - HOVER BOARD
Summary
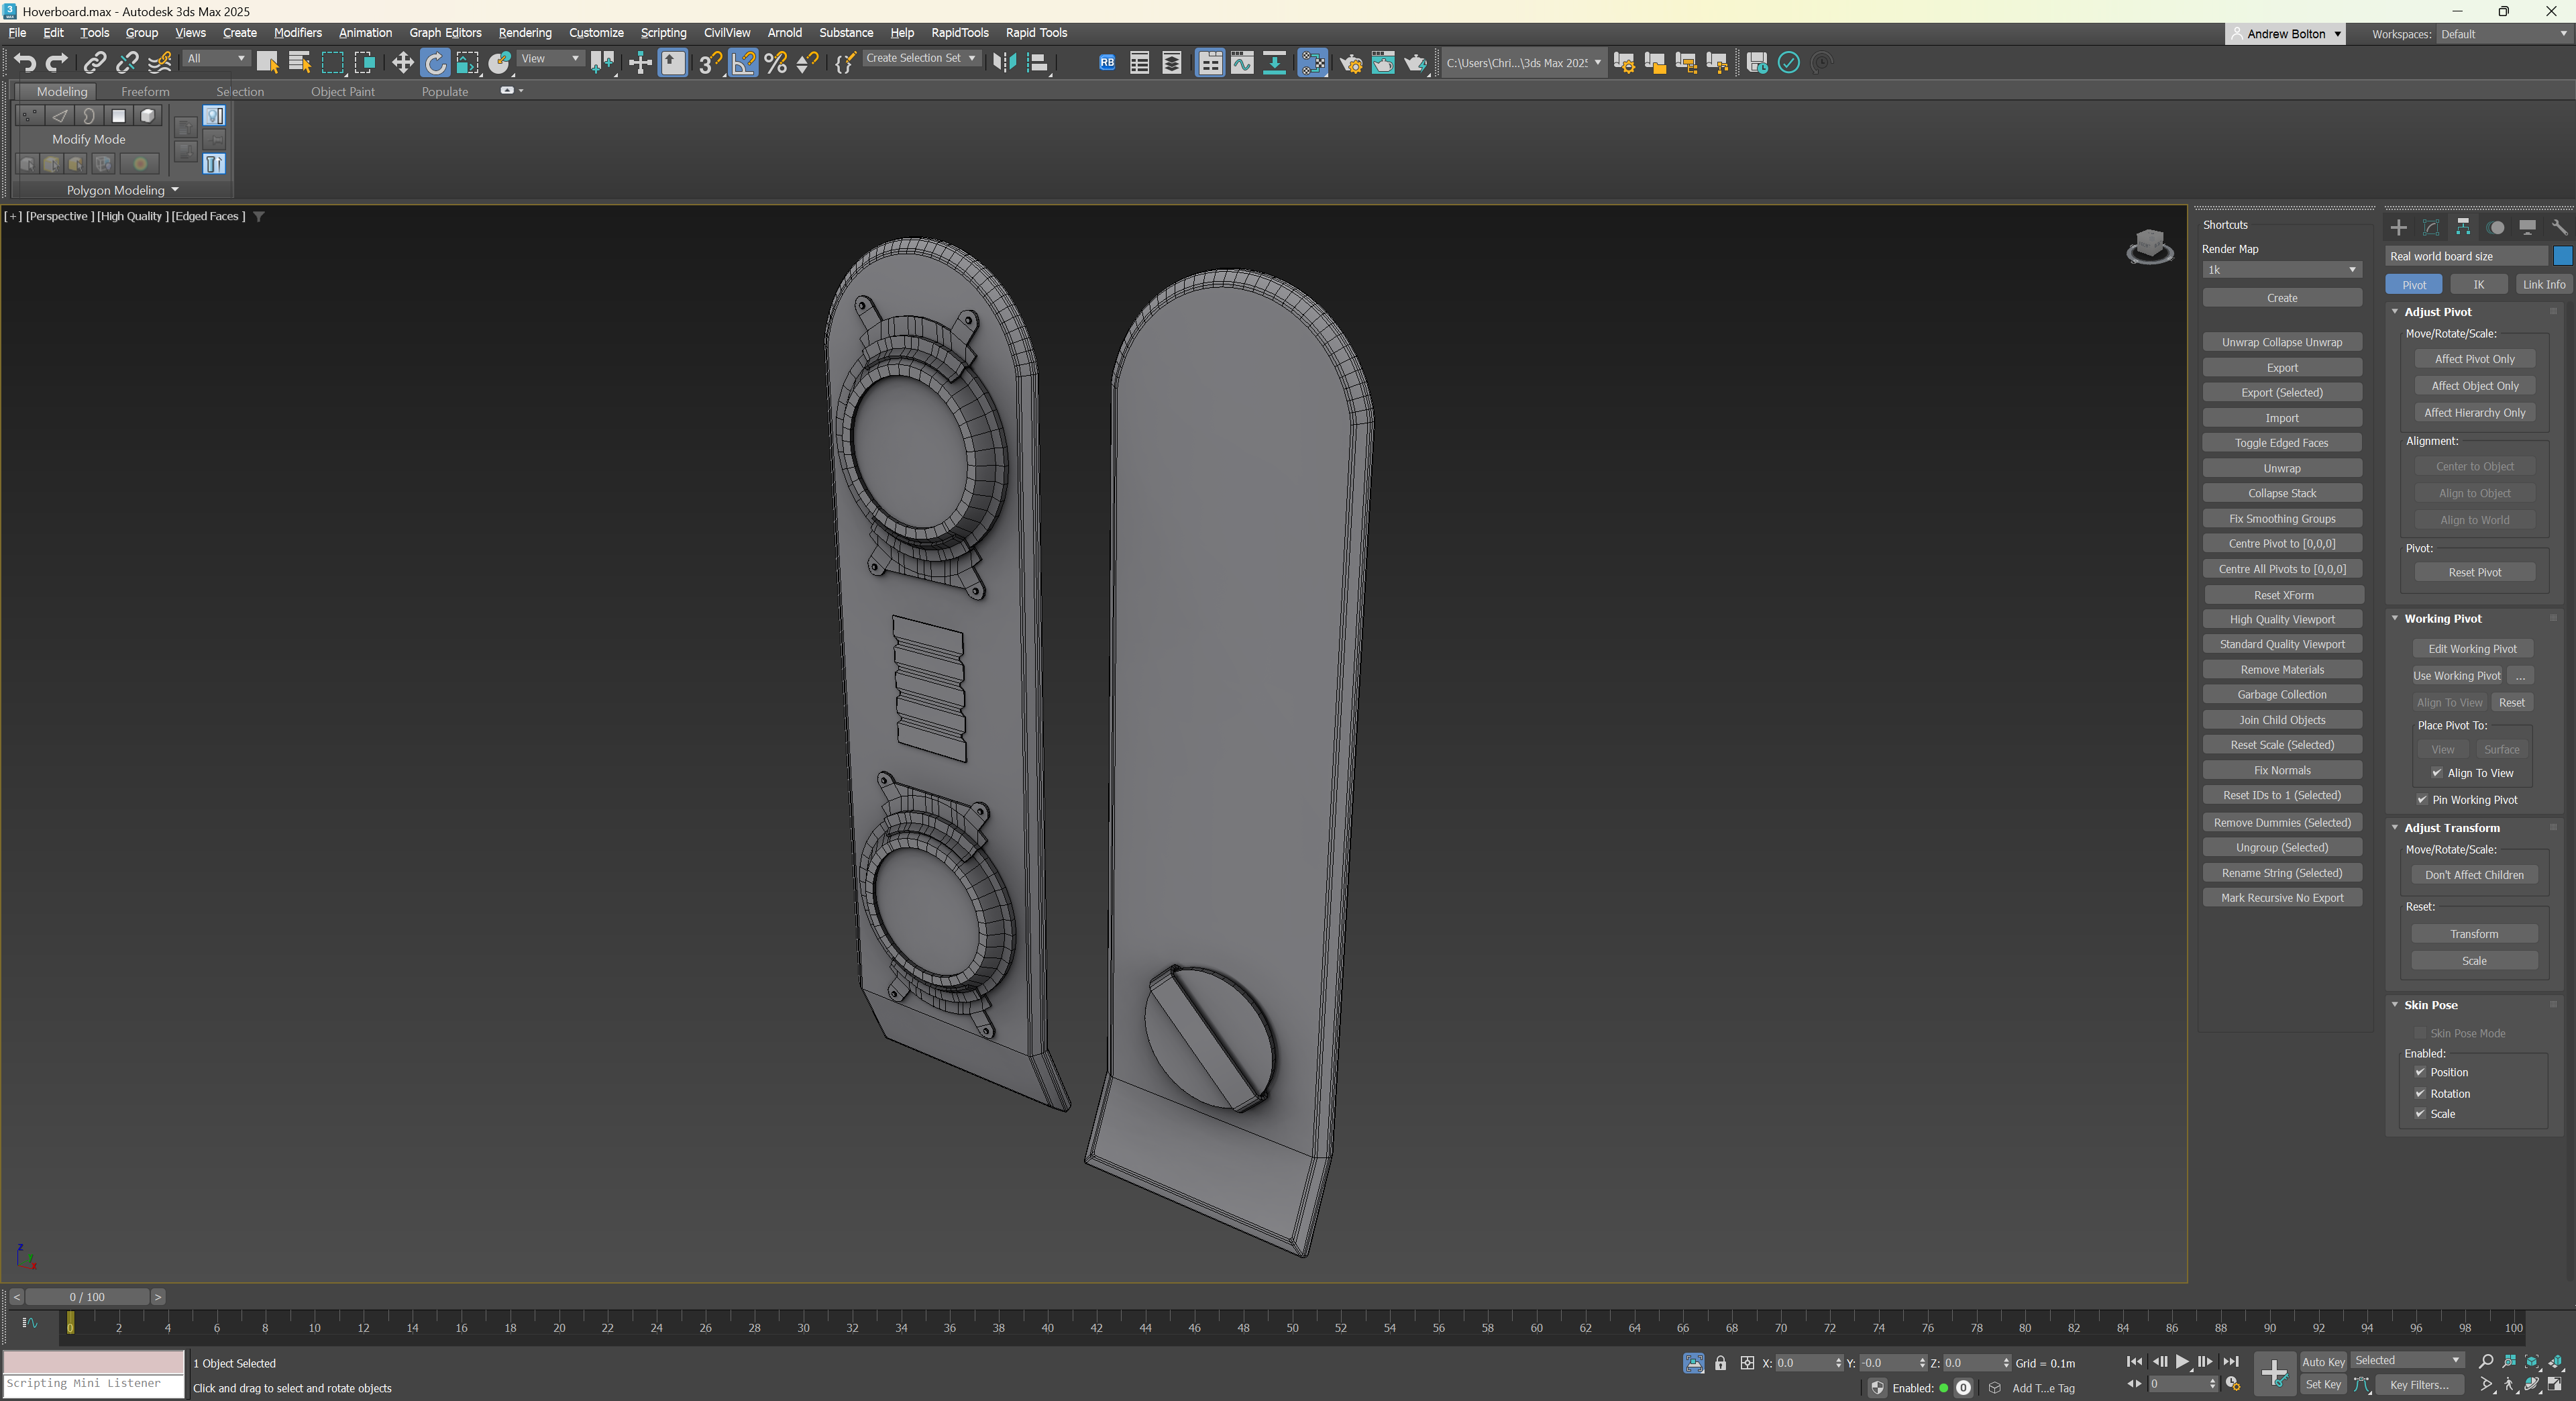
Watching Back to the Future Part II inspired me to create this model, and it was a really rewarding piece to work on from start to finish. Gathering good references at the beginning made the modeling phase straightforward using simple box modeling and splines in 3ds Max.
To keep the workflow flexible, I set up a pipeline where variants can be generated in minutes: Quixel handles broad material and color changes, while a central Photoshop PSD manages custom graphics and decals. The entire piece took around 8 hours within a 2-day self-imposed deadline for modeling, texturing, and presentation.
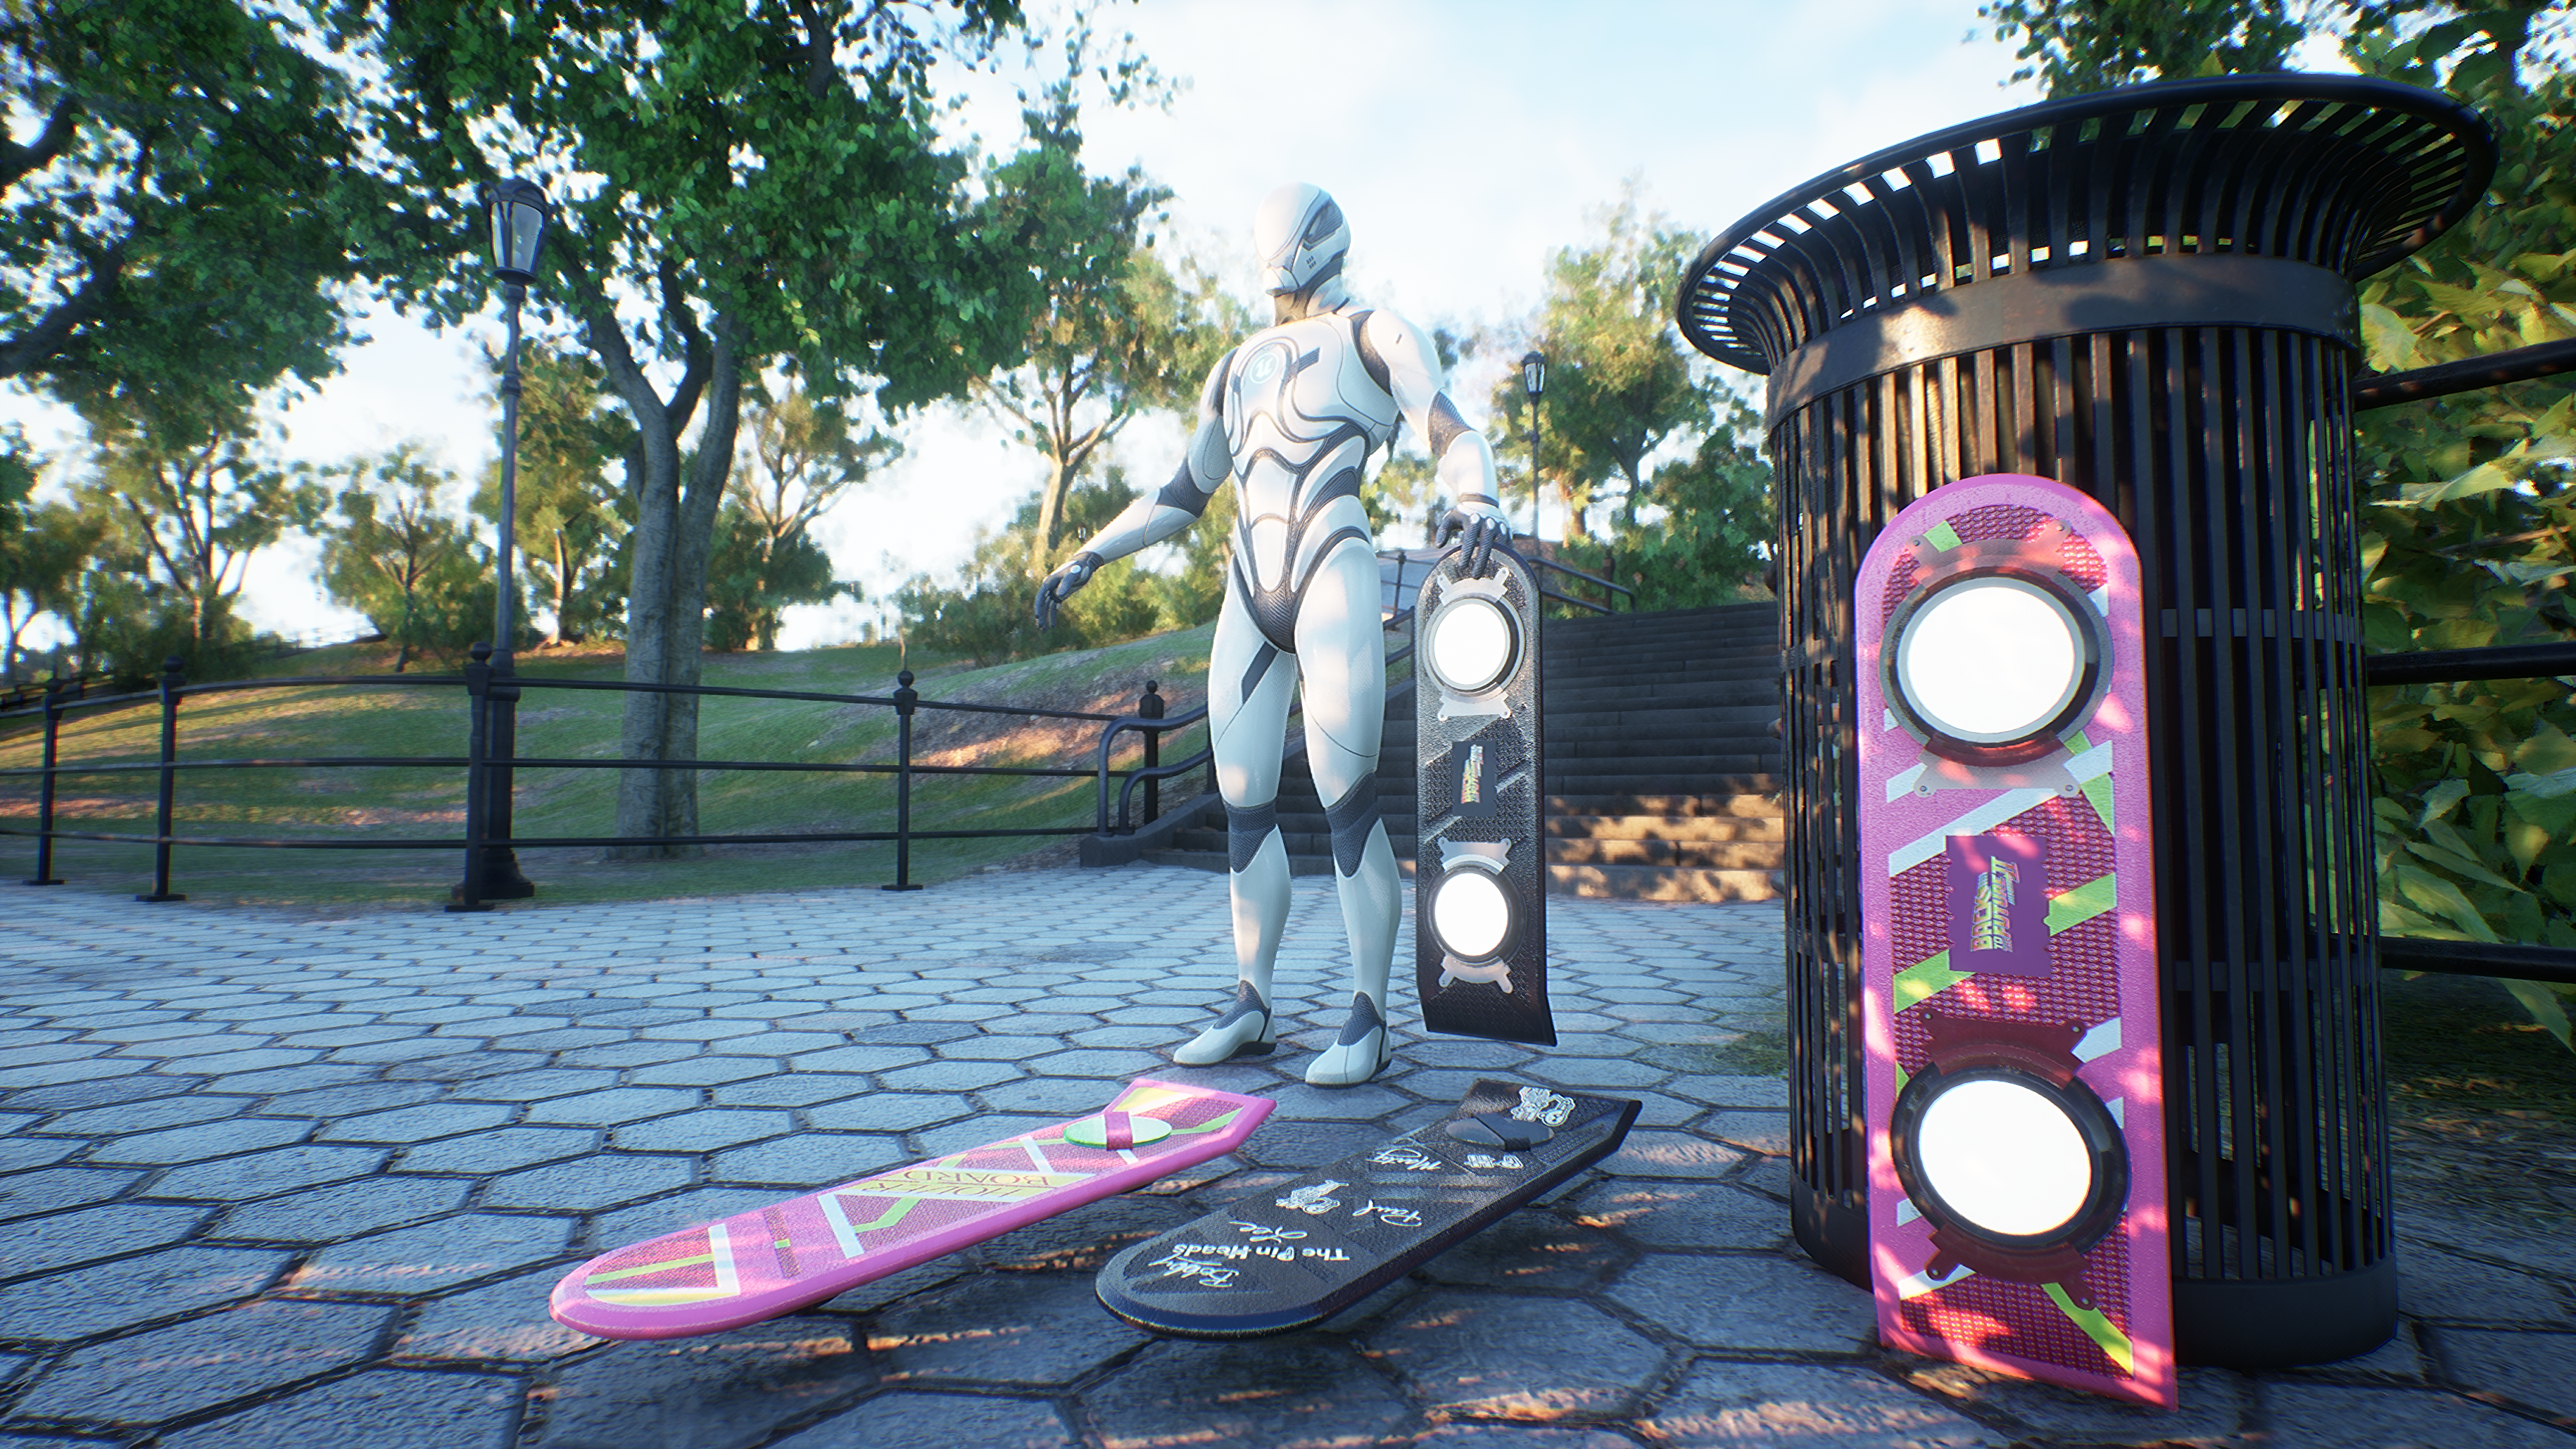
Looking back, I would have preferred a bit more time to refine the underside scratches and dirt so the wear felt less uniform. I wanted this to be a hero piece and something a player can view up close, but for optimization, the final texture resolution should be a lot lower. That aside, I am happy with the end result; I always like to incorporate a story and details into a model, especially when it's a single asset. The band merchandise alternate texture was fun and simple to implement and has led to a useful modular workflow. The following details that workflow and my creative process.
1. Reference & Modeling Process
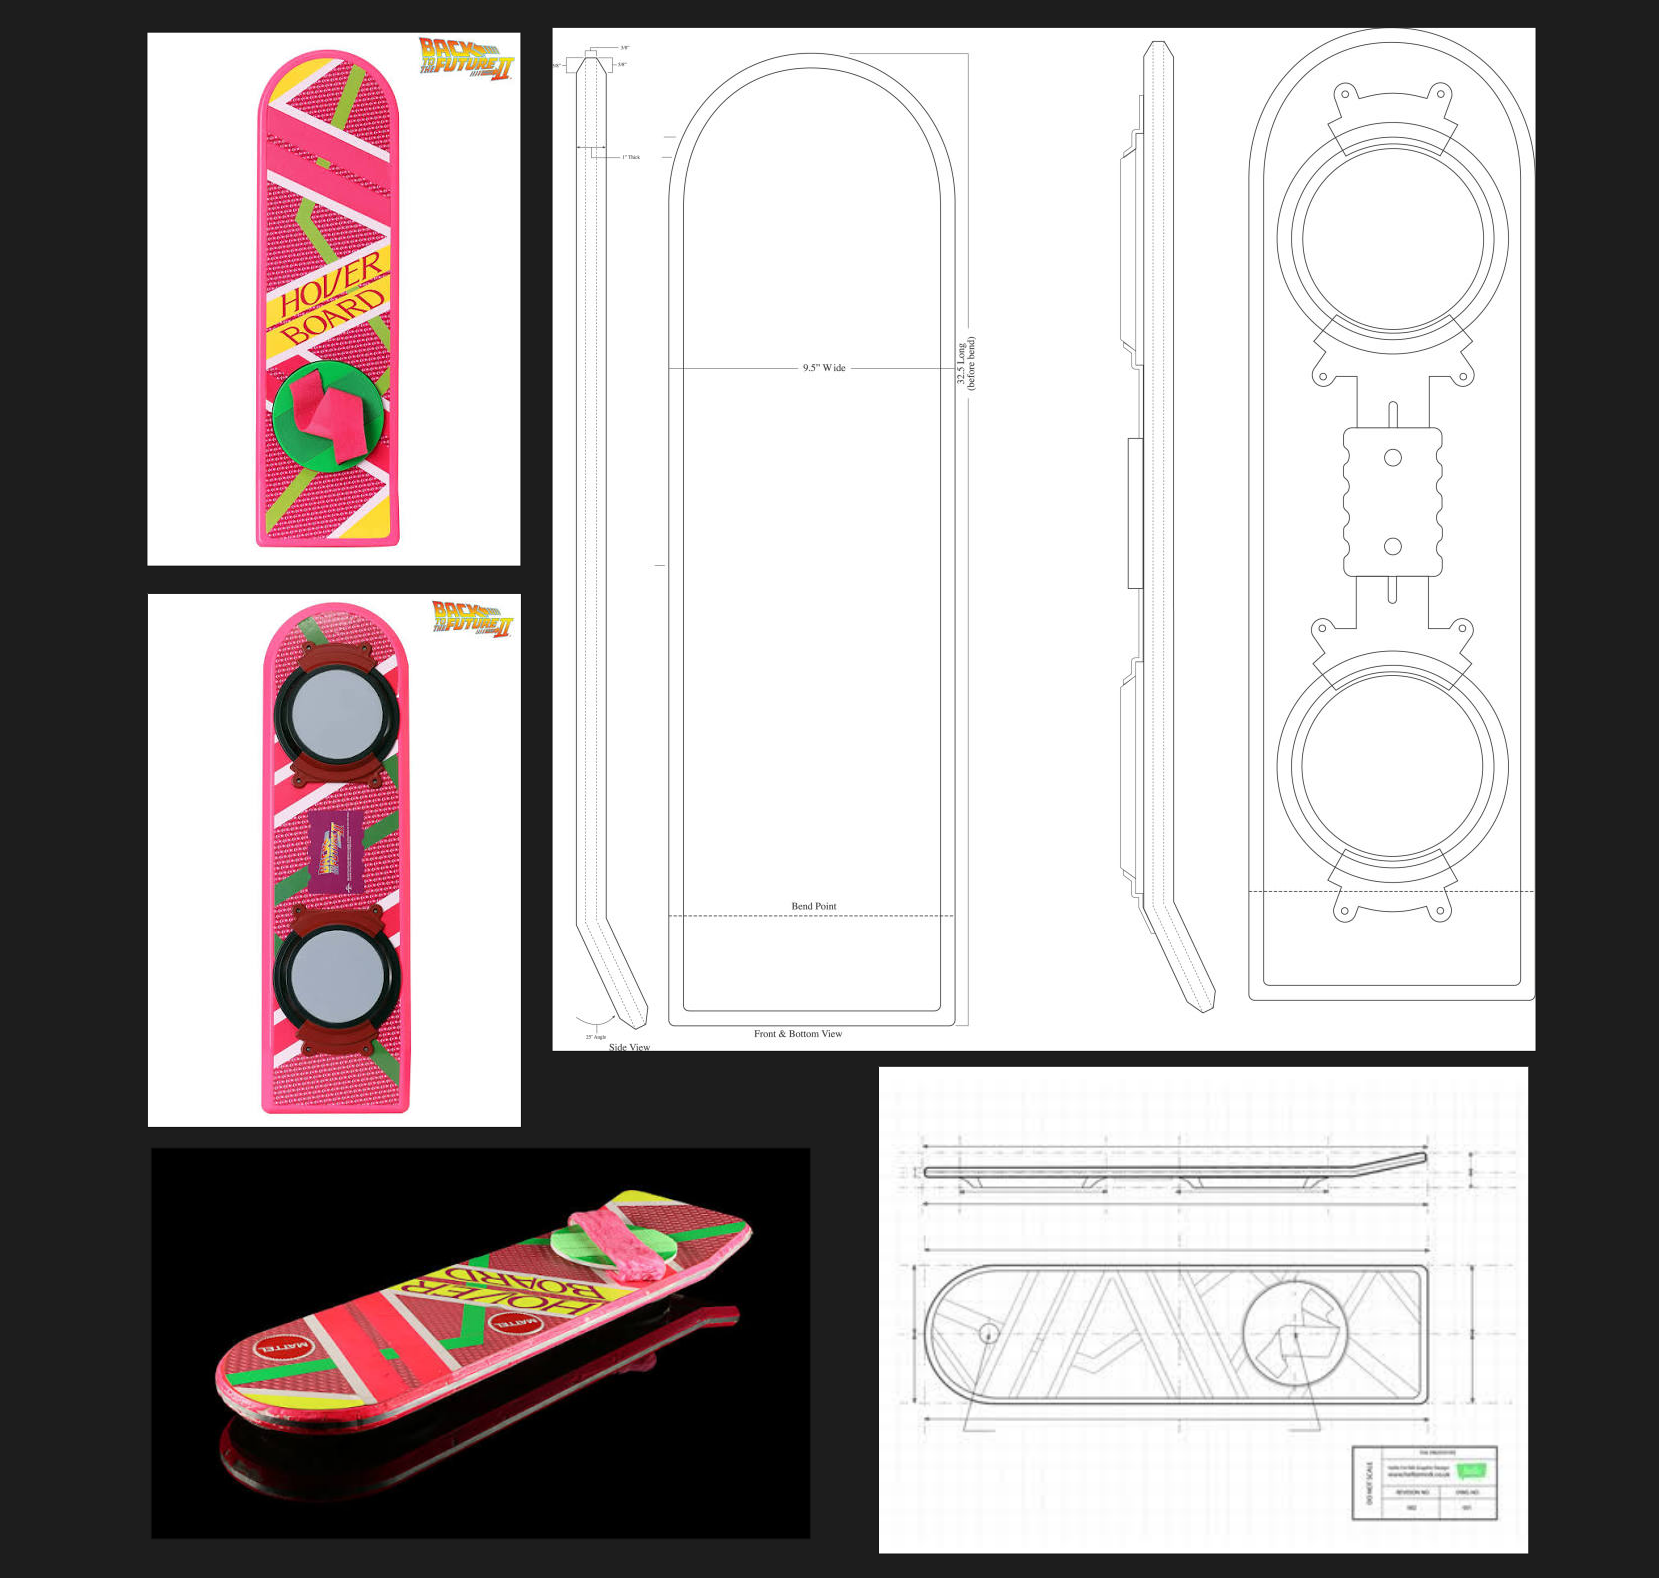
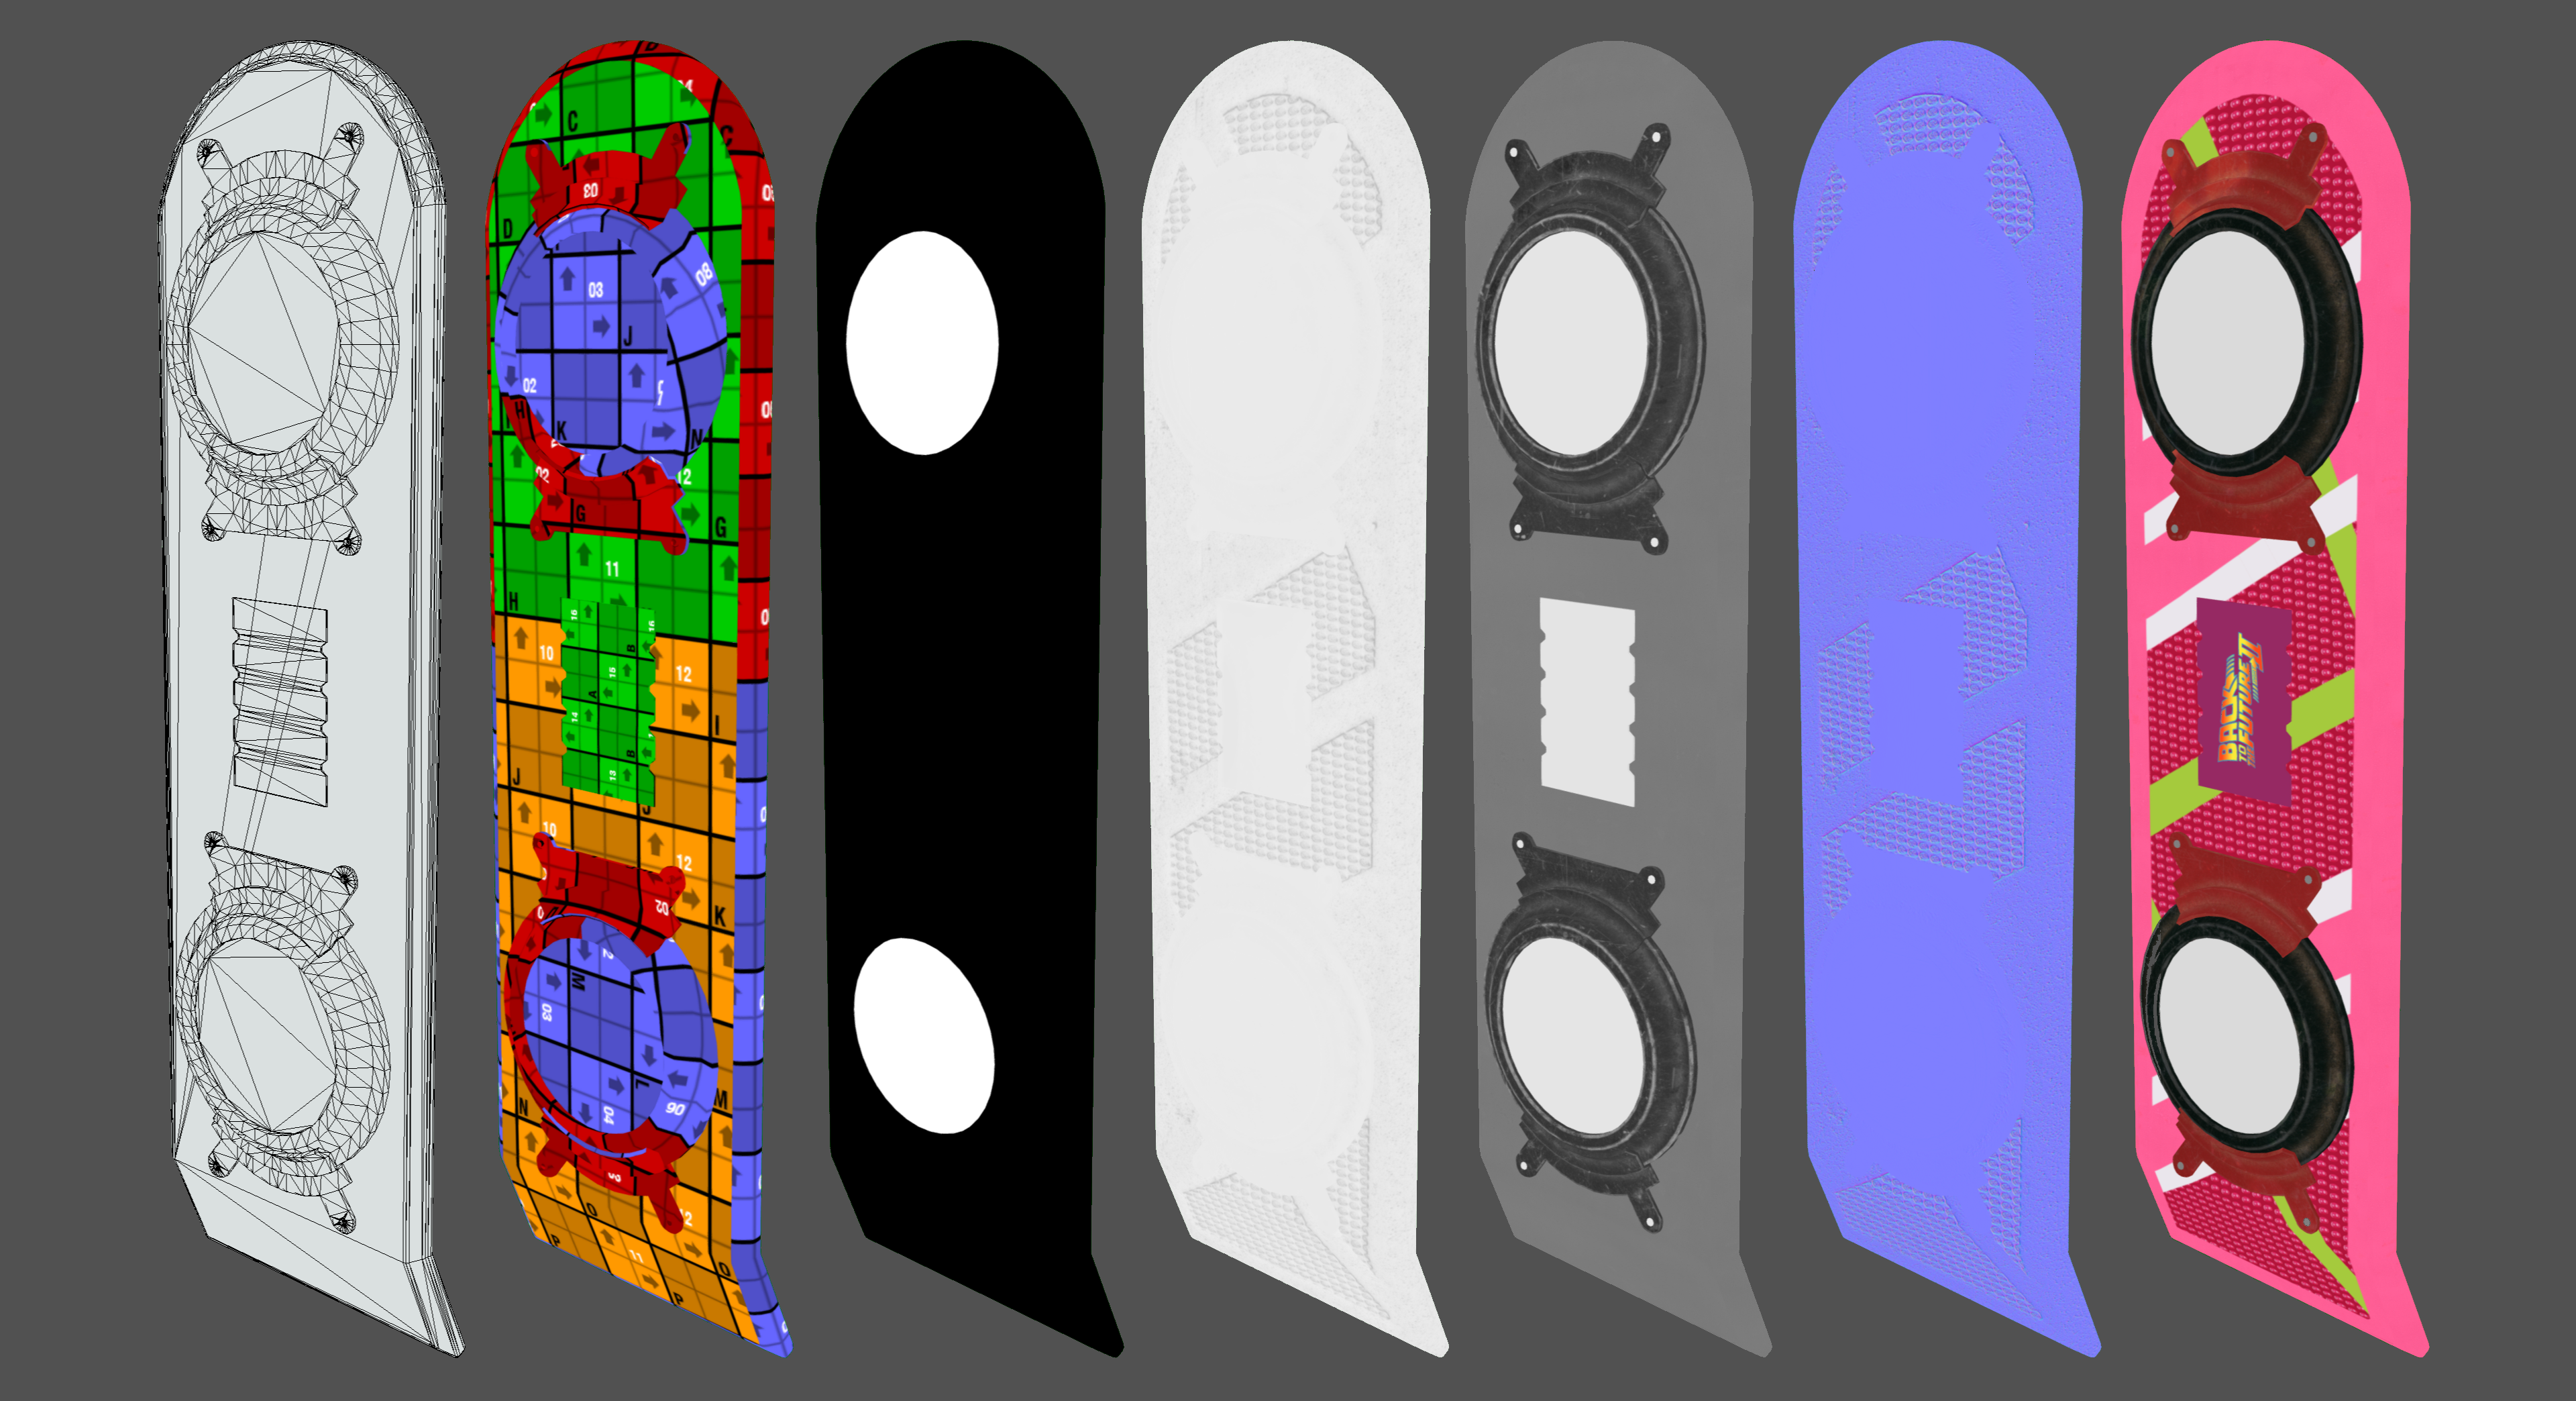
I began by gathering reference imagery, including detailed shots of the top and bottom of the prop alongside a dimensional scale drawing to guide the overall proportions. Using 3ds Max, I then blocked out and refined the model using box modeling techniques and splines. Thanks to the dimensional references, I was able to maintain real-world scale throughout:
-
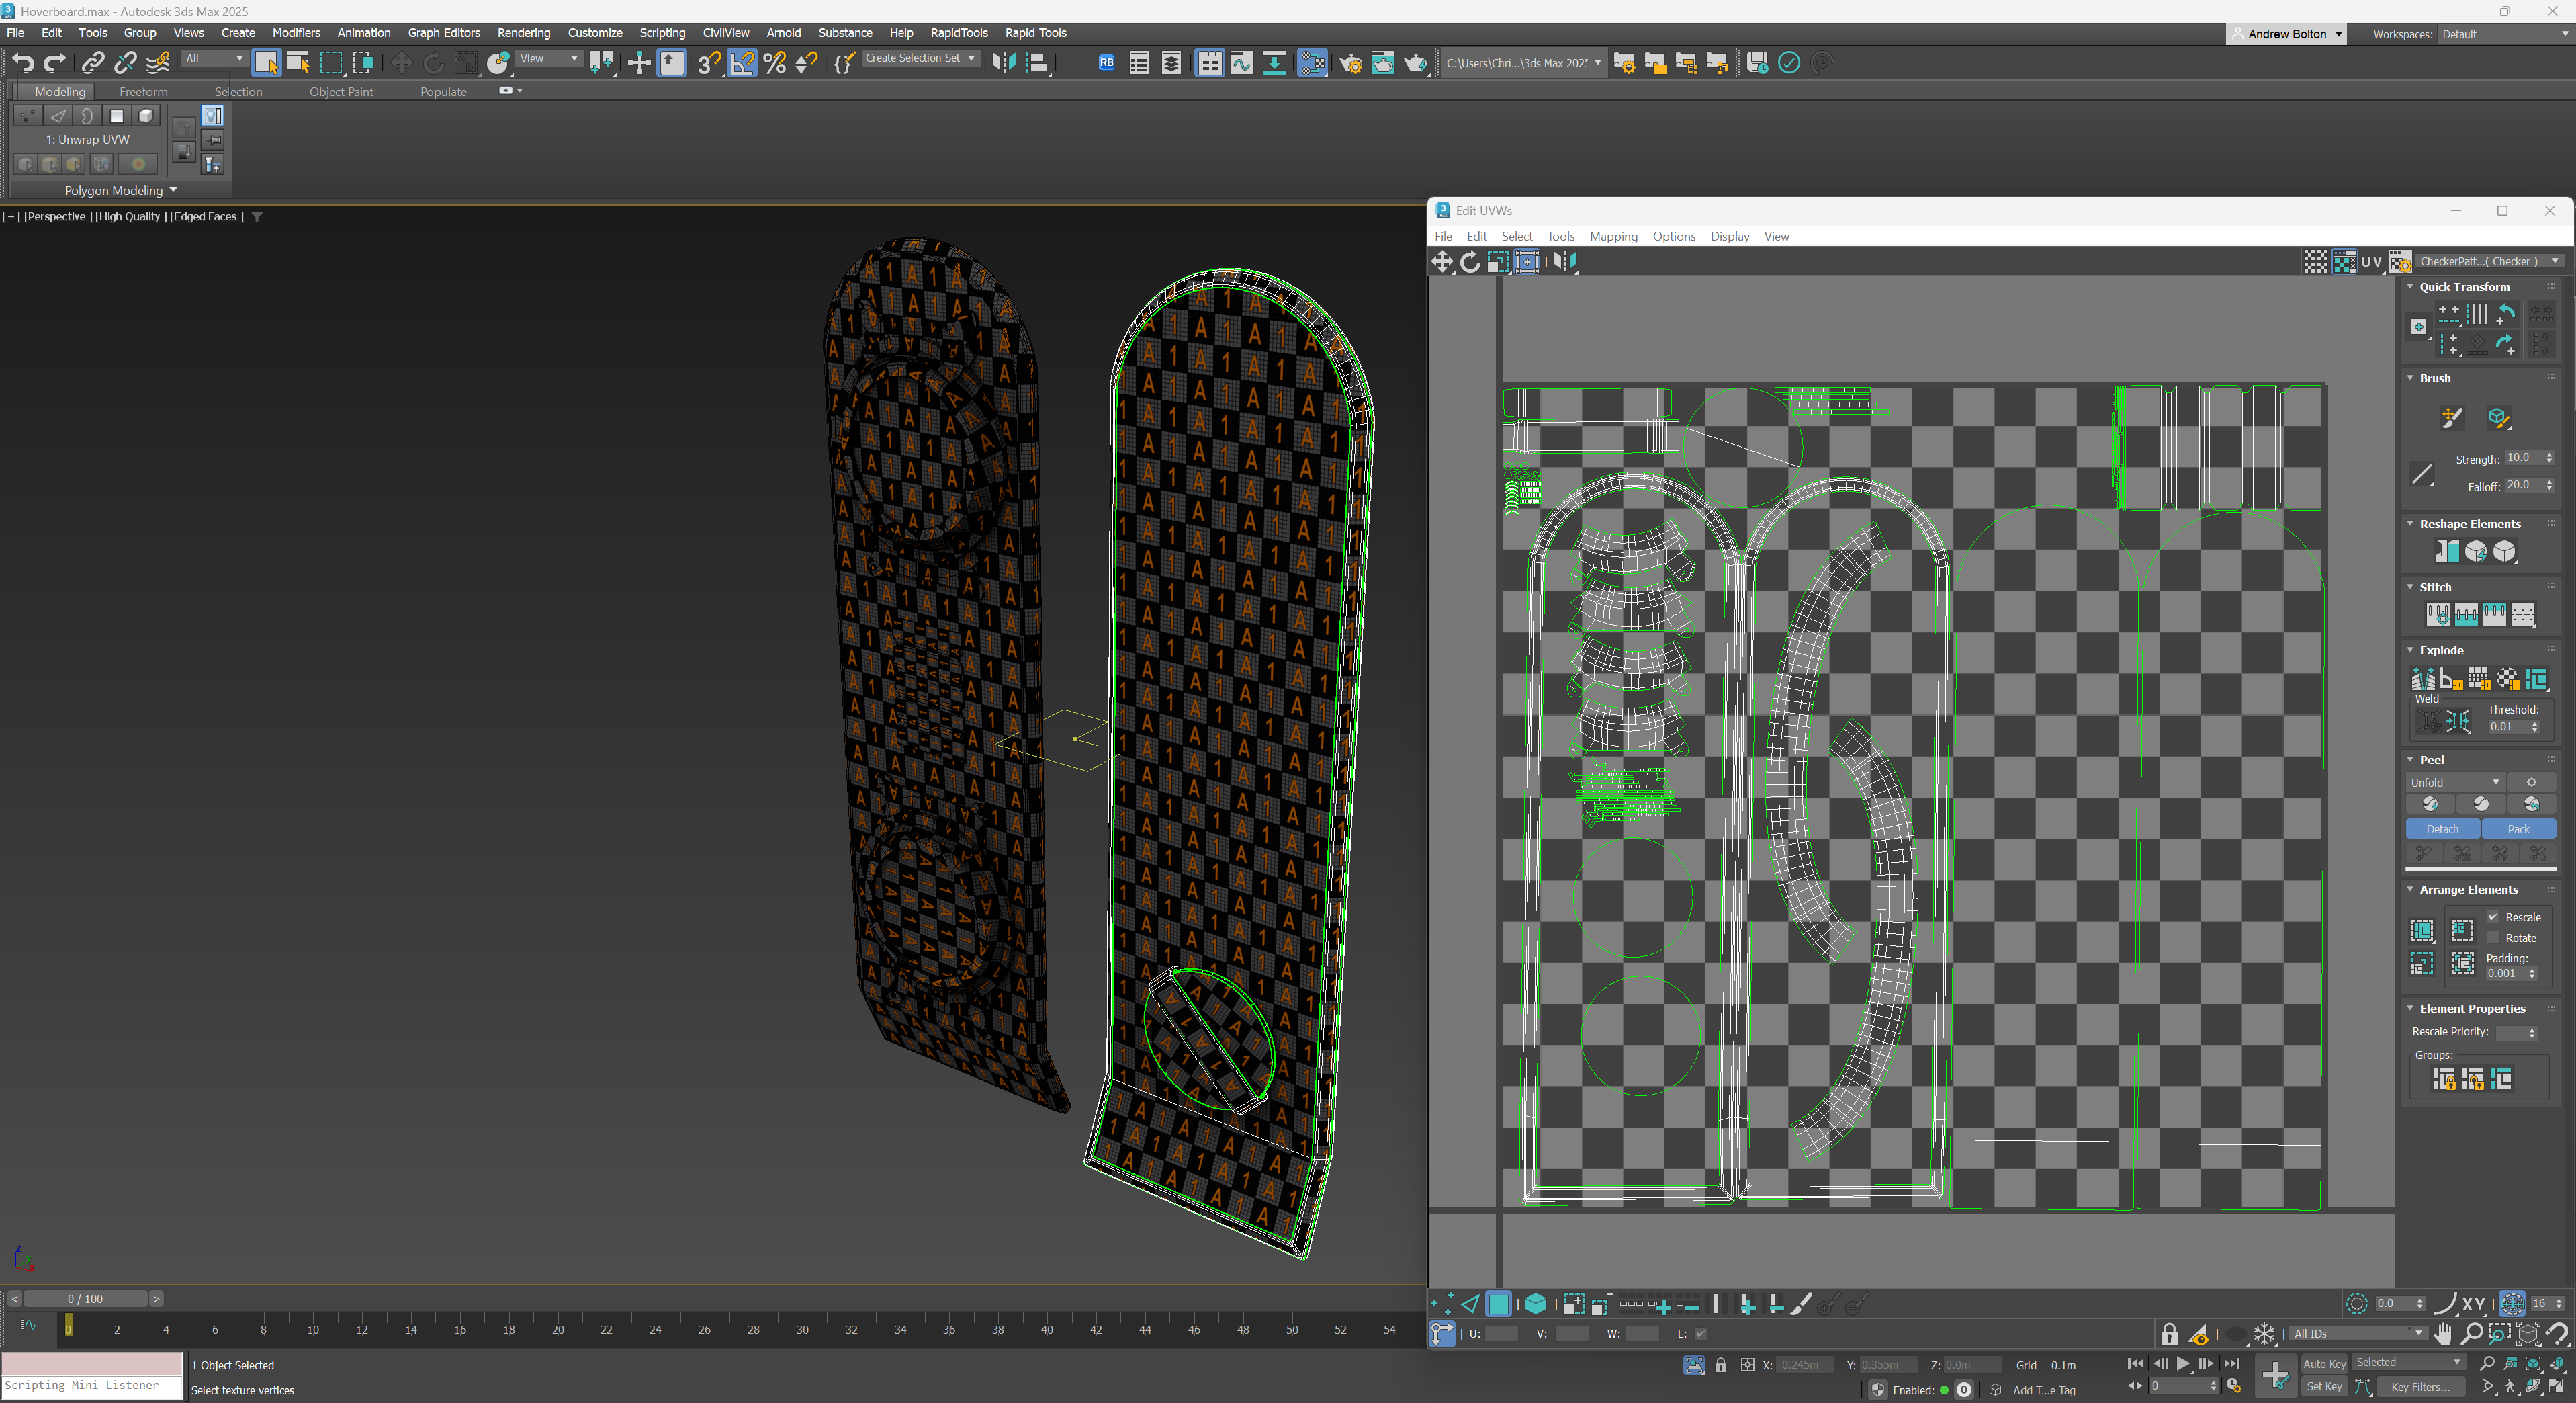
UV were packed into a single 0-1 UV space while ensuring consistent texel density across all components.
-
Material ID Map: Rendered a Material ID map to separate distinct material groups (plastics, metals, and foam elements) for texturing in Quixel.
-
Final Checks: Verified scale and smoothing groups prior to exporting the mesh.
2. Texturing in Quixel Suite
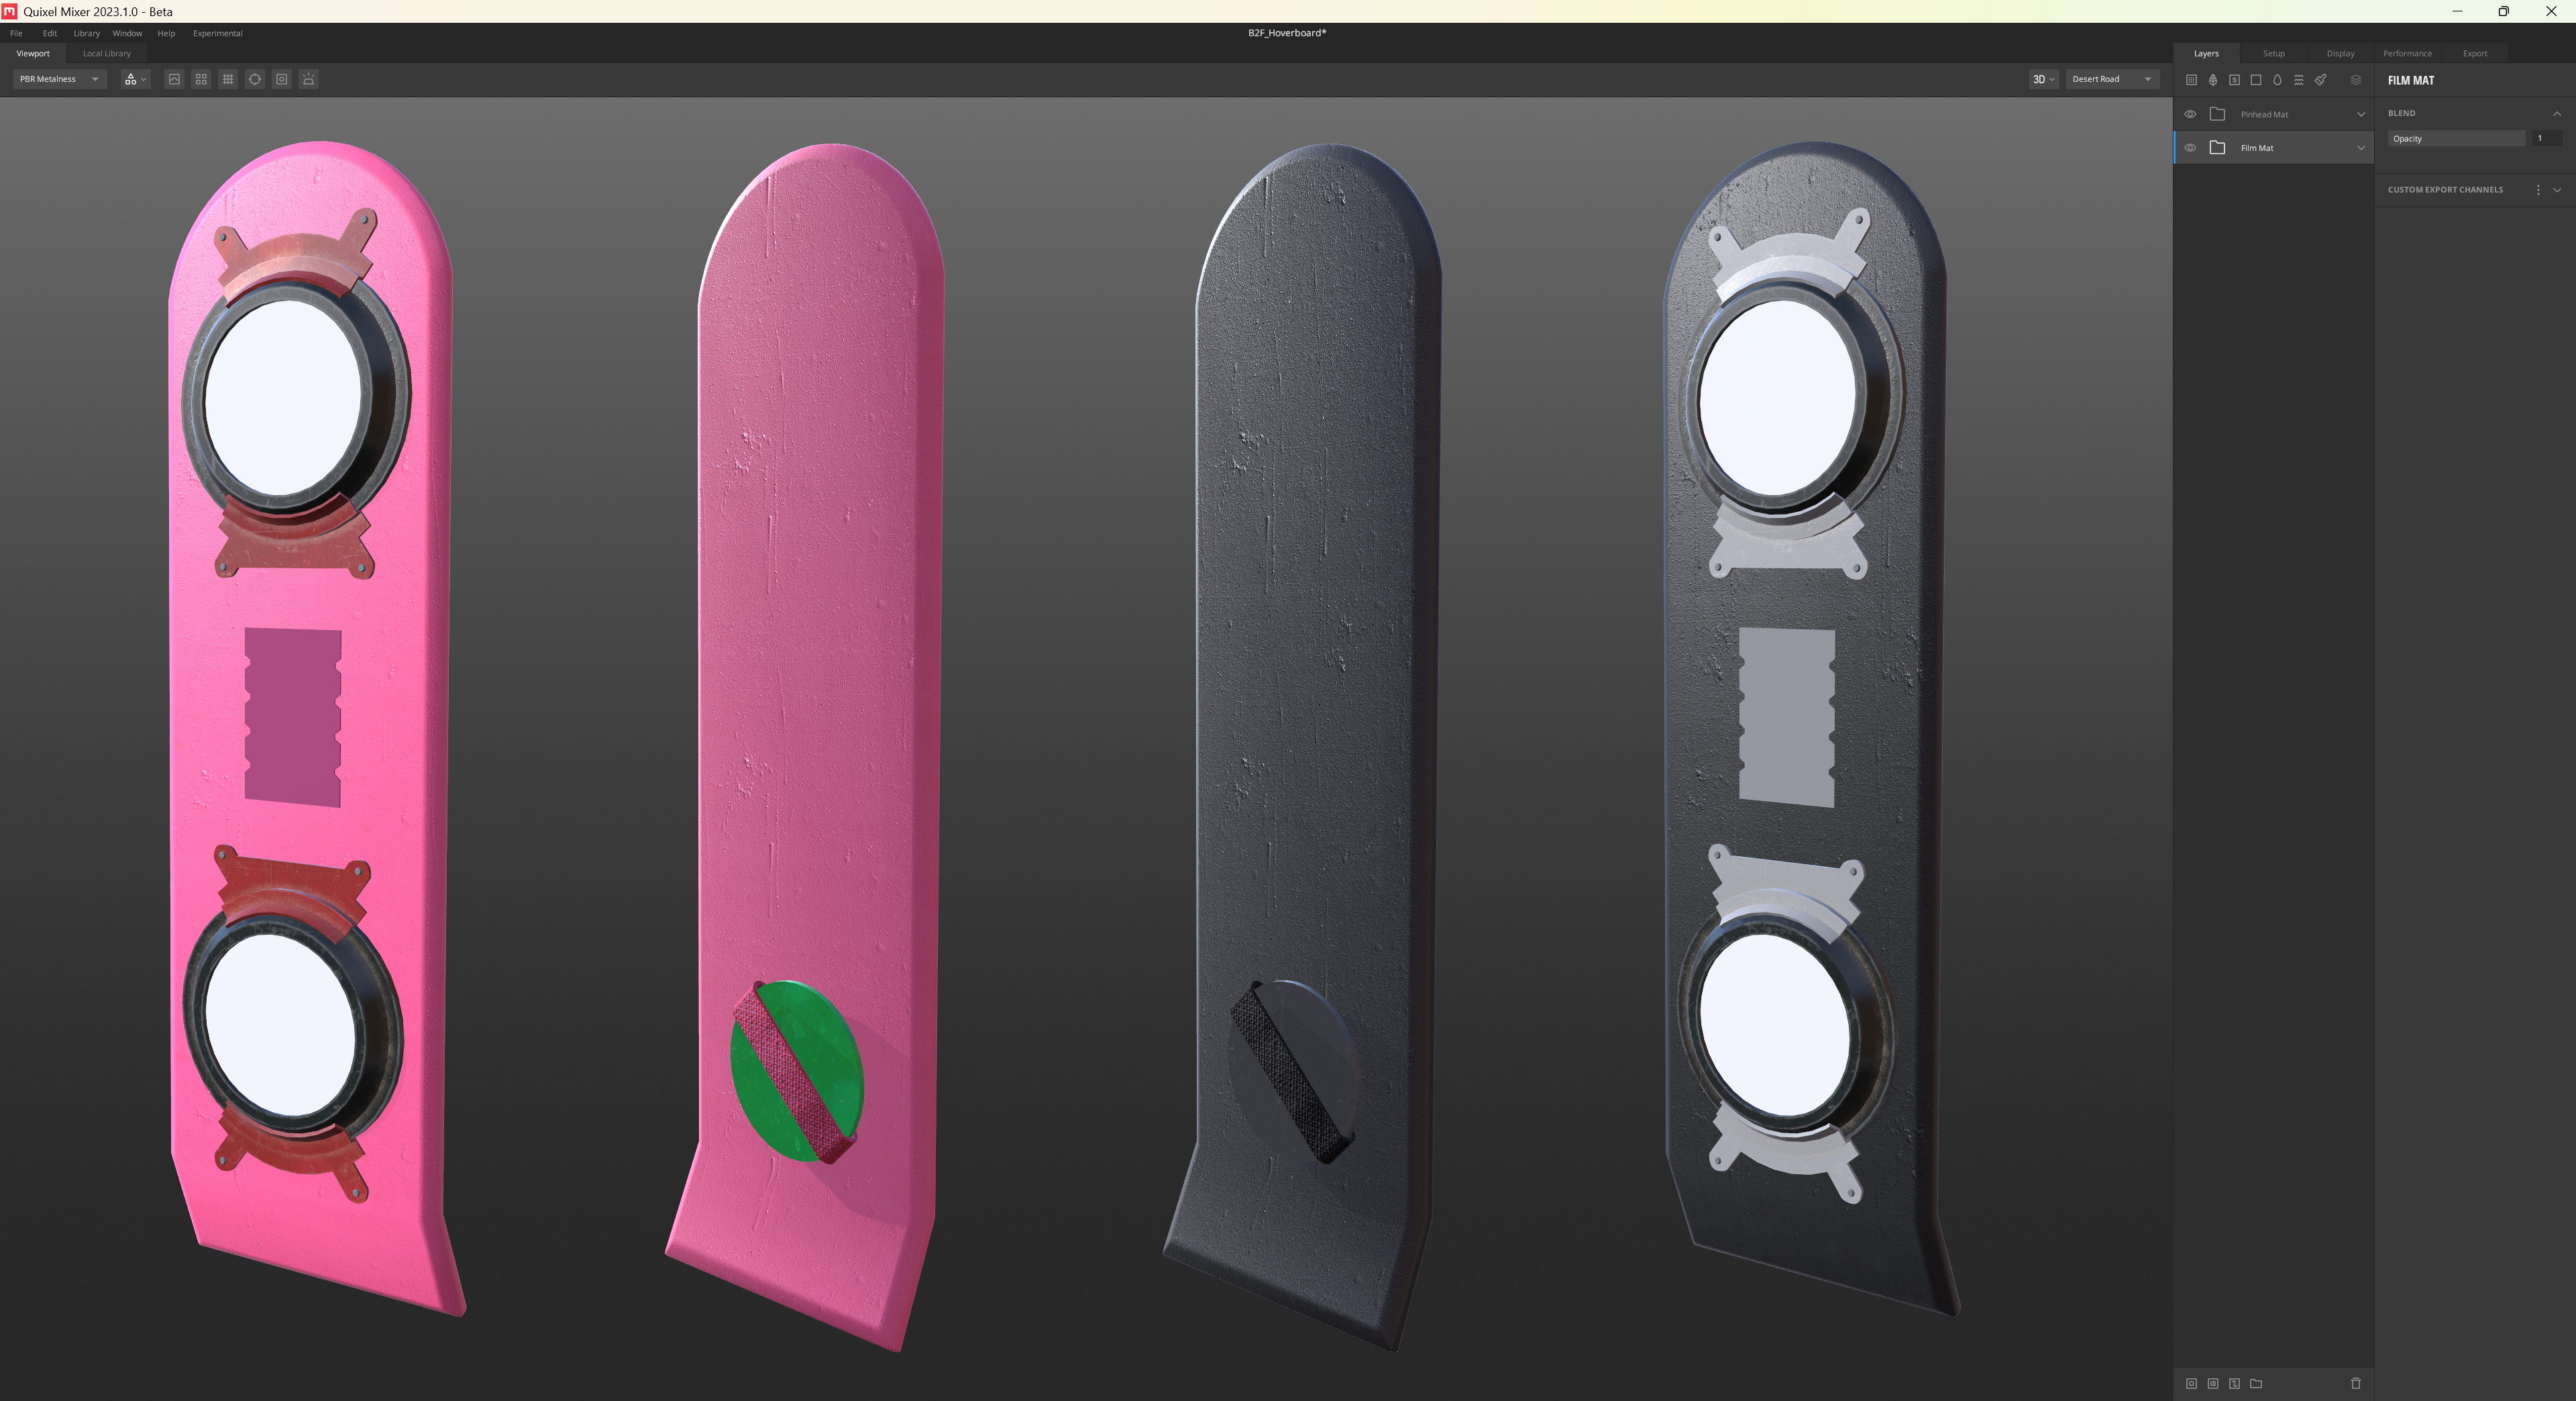
When applying base materials in Quixel, I realized that the iconic multi-colored graphic pattern on the top and underside would need to be created custom in Photoshop. I instead focused on applying the core materials. I applied base materials and colour matching for the plastic, fabric strap, foam board, and metal components, adding subtle surface wear, including light scratches and grime on the underside plastics.
3. Graphic Design & Alternate Timeline Concept (Photoshop)
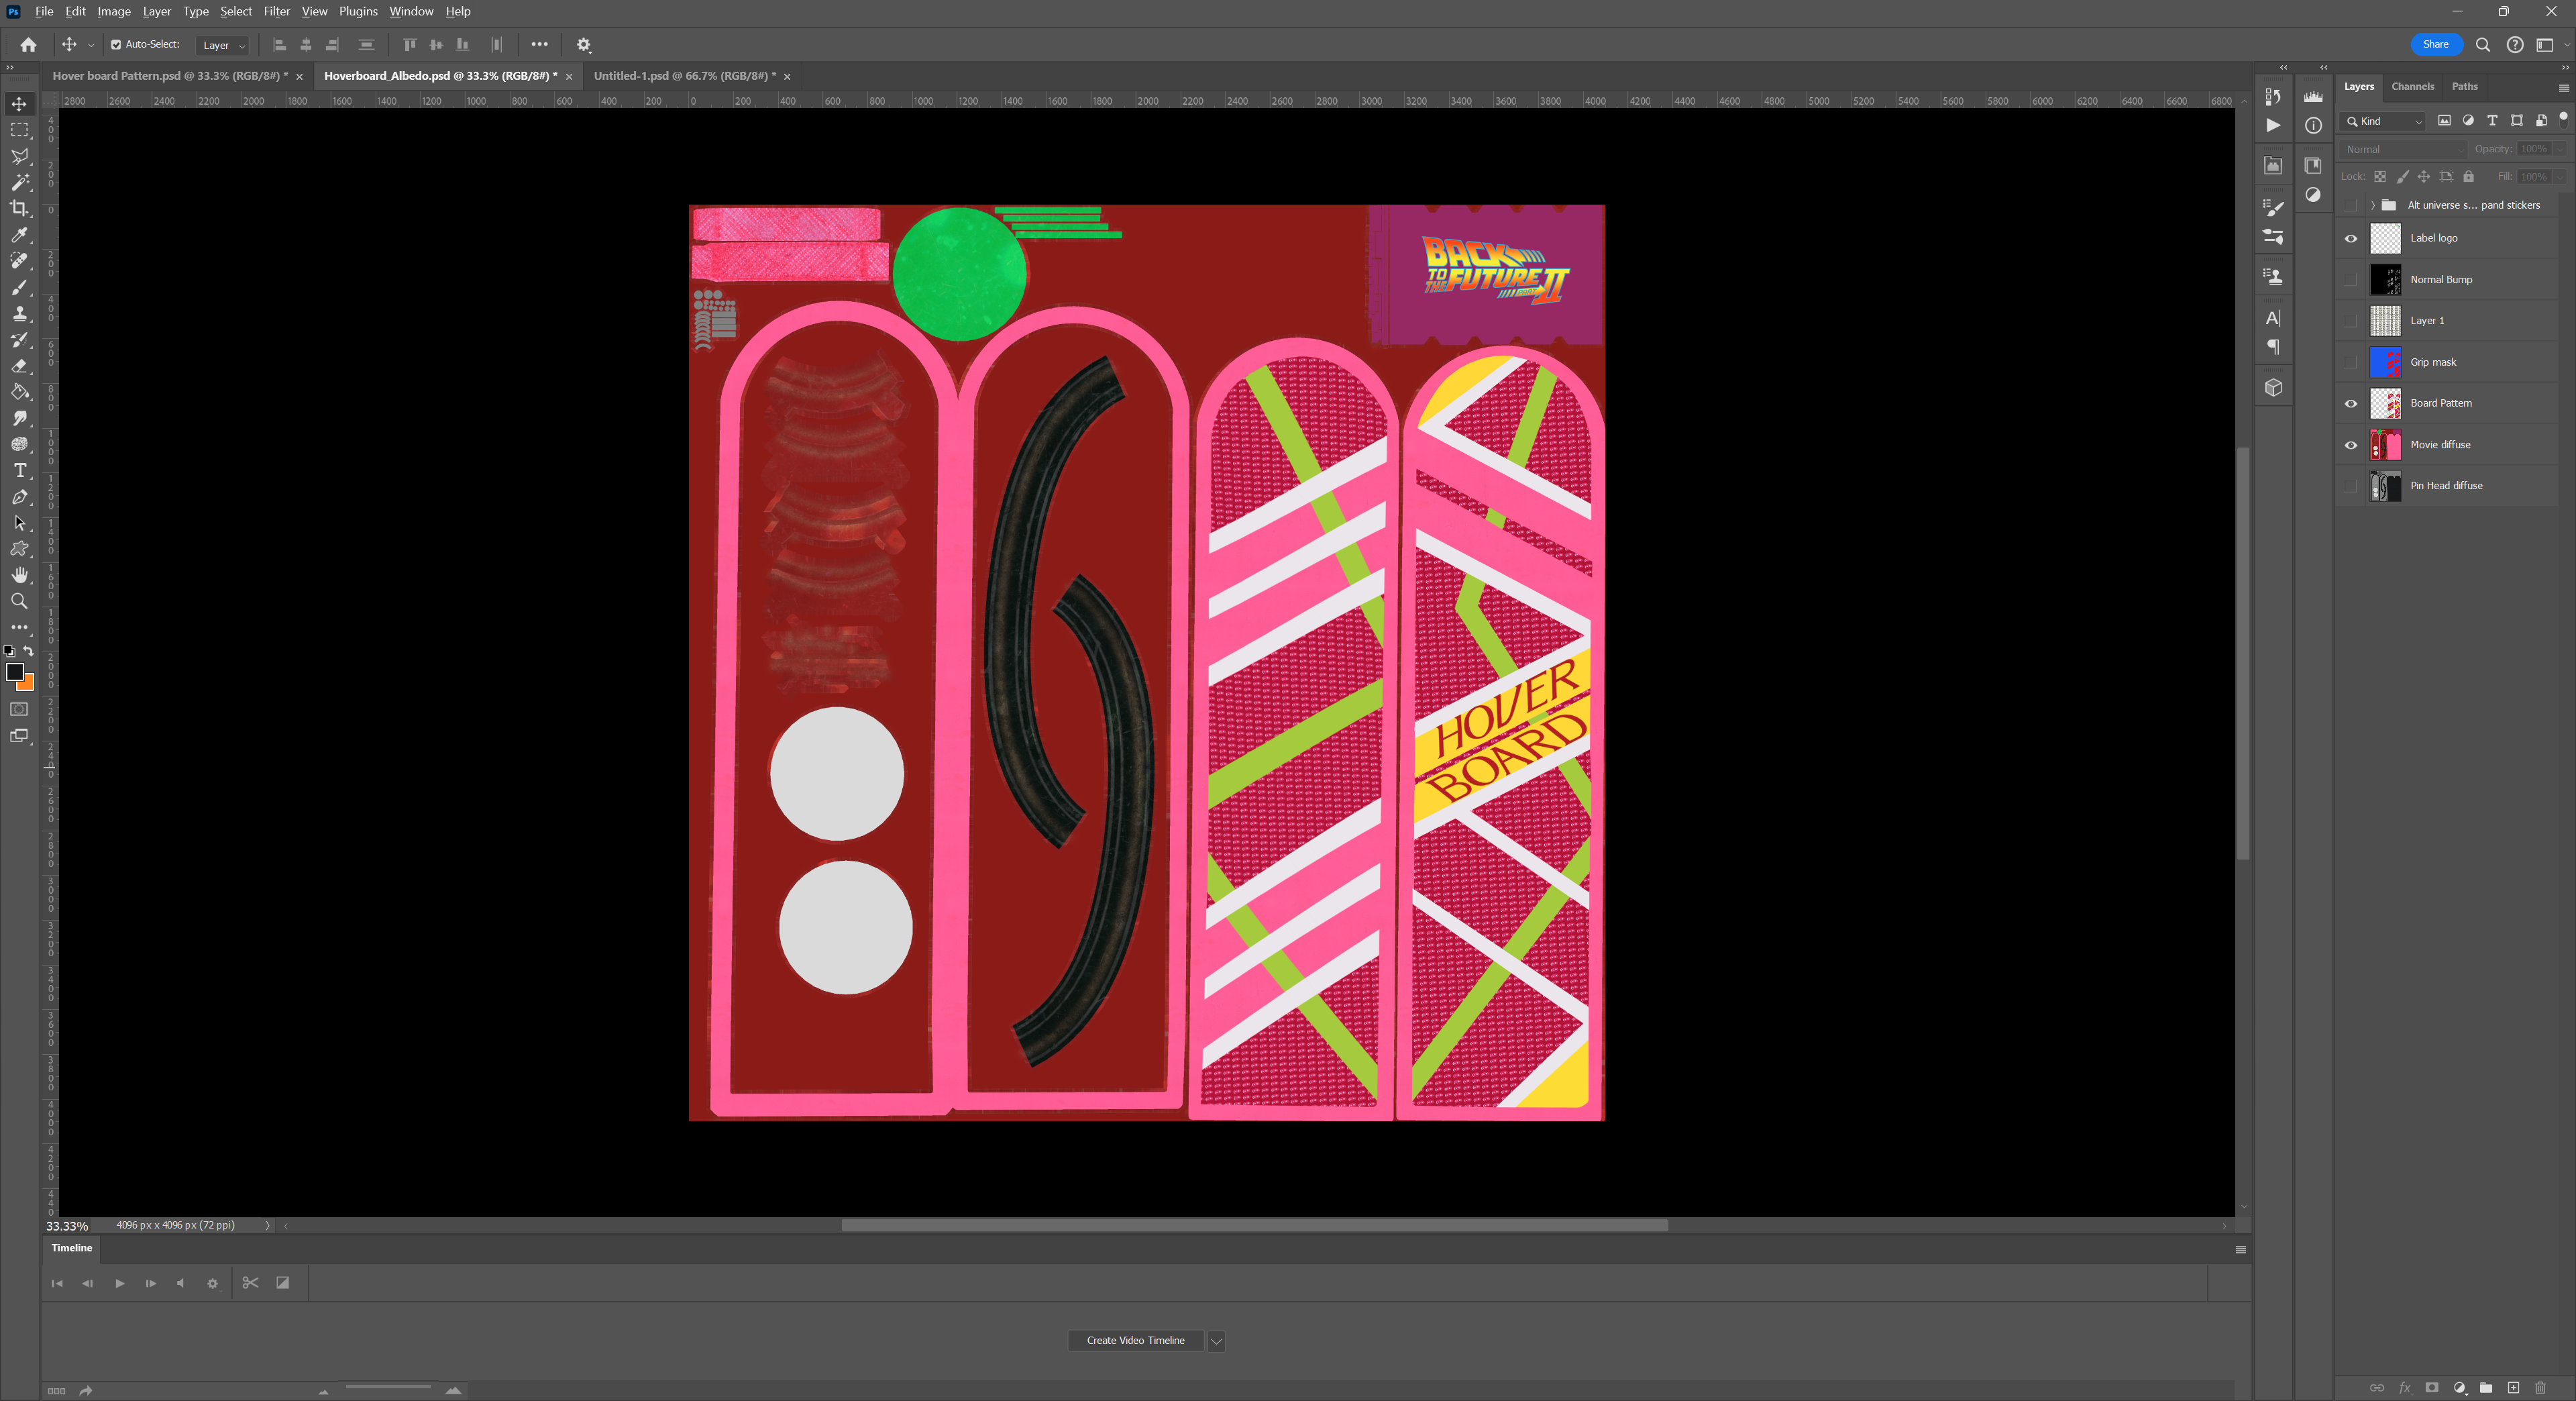
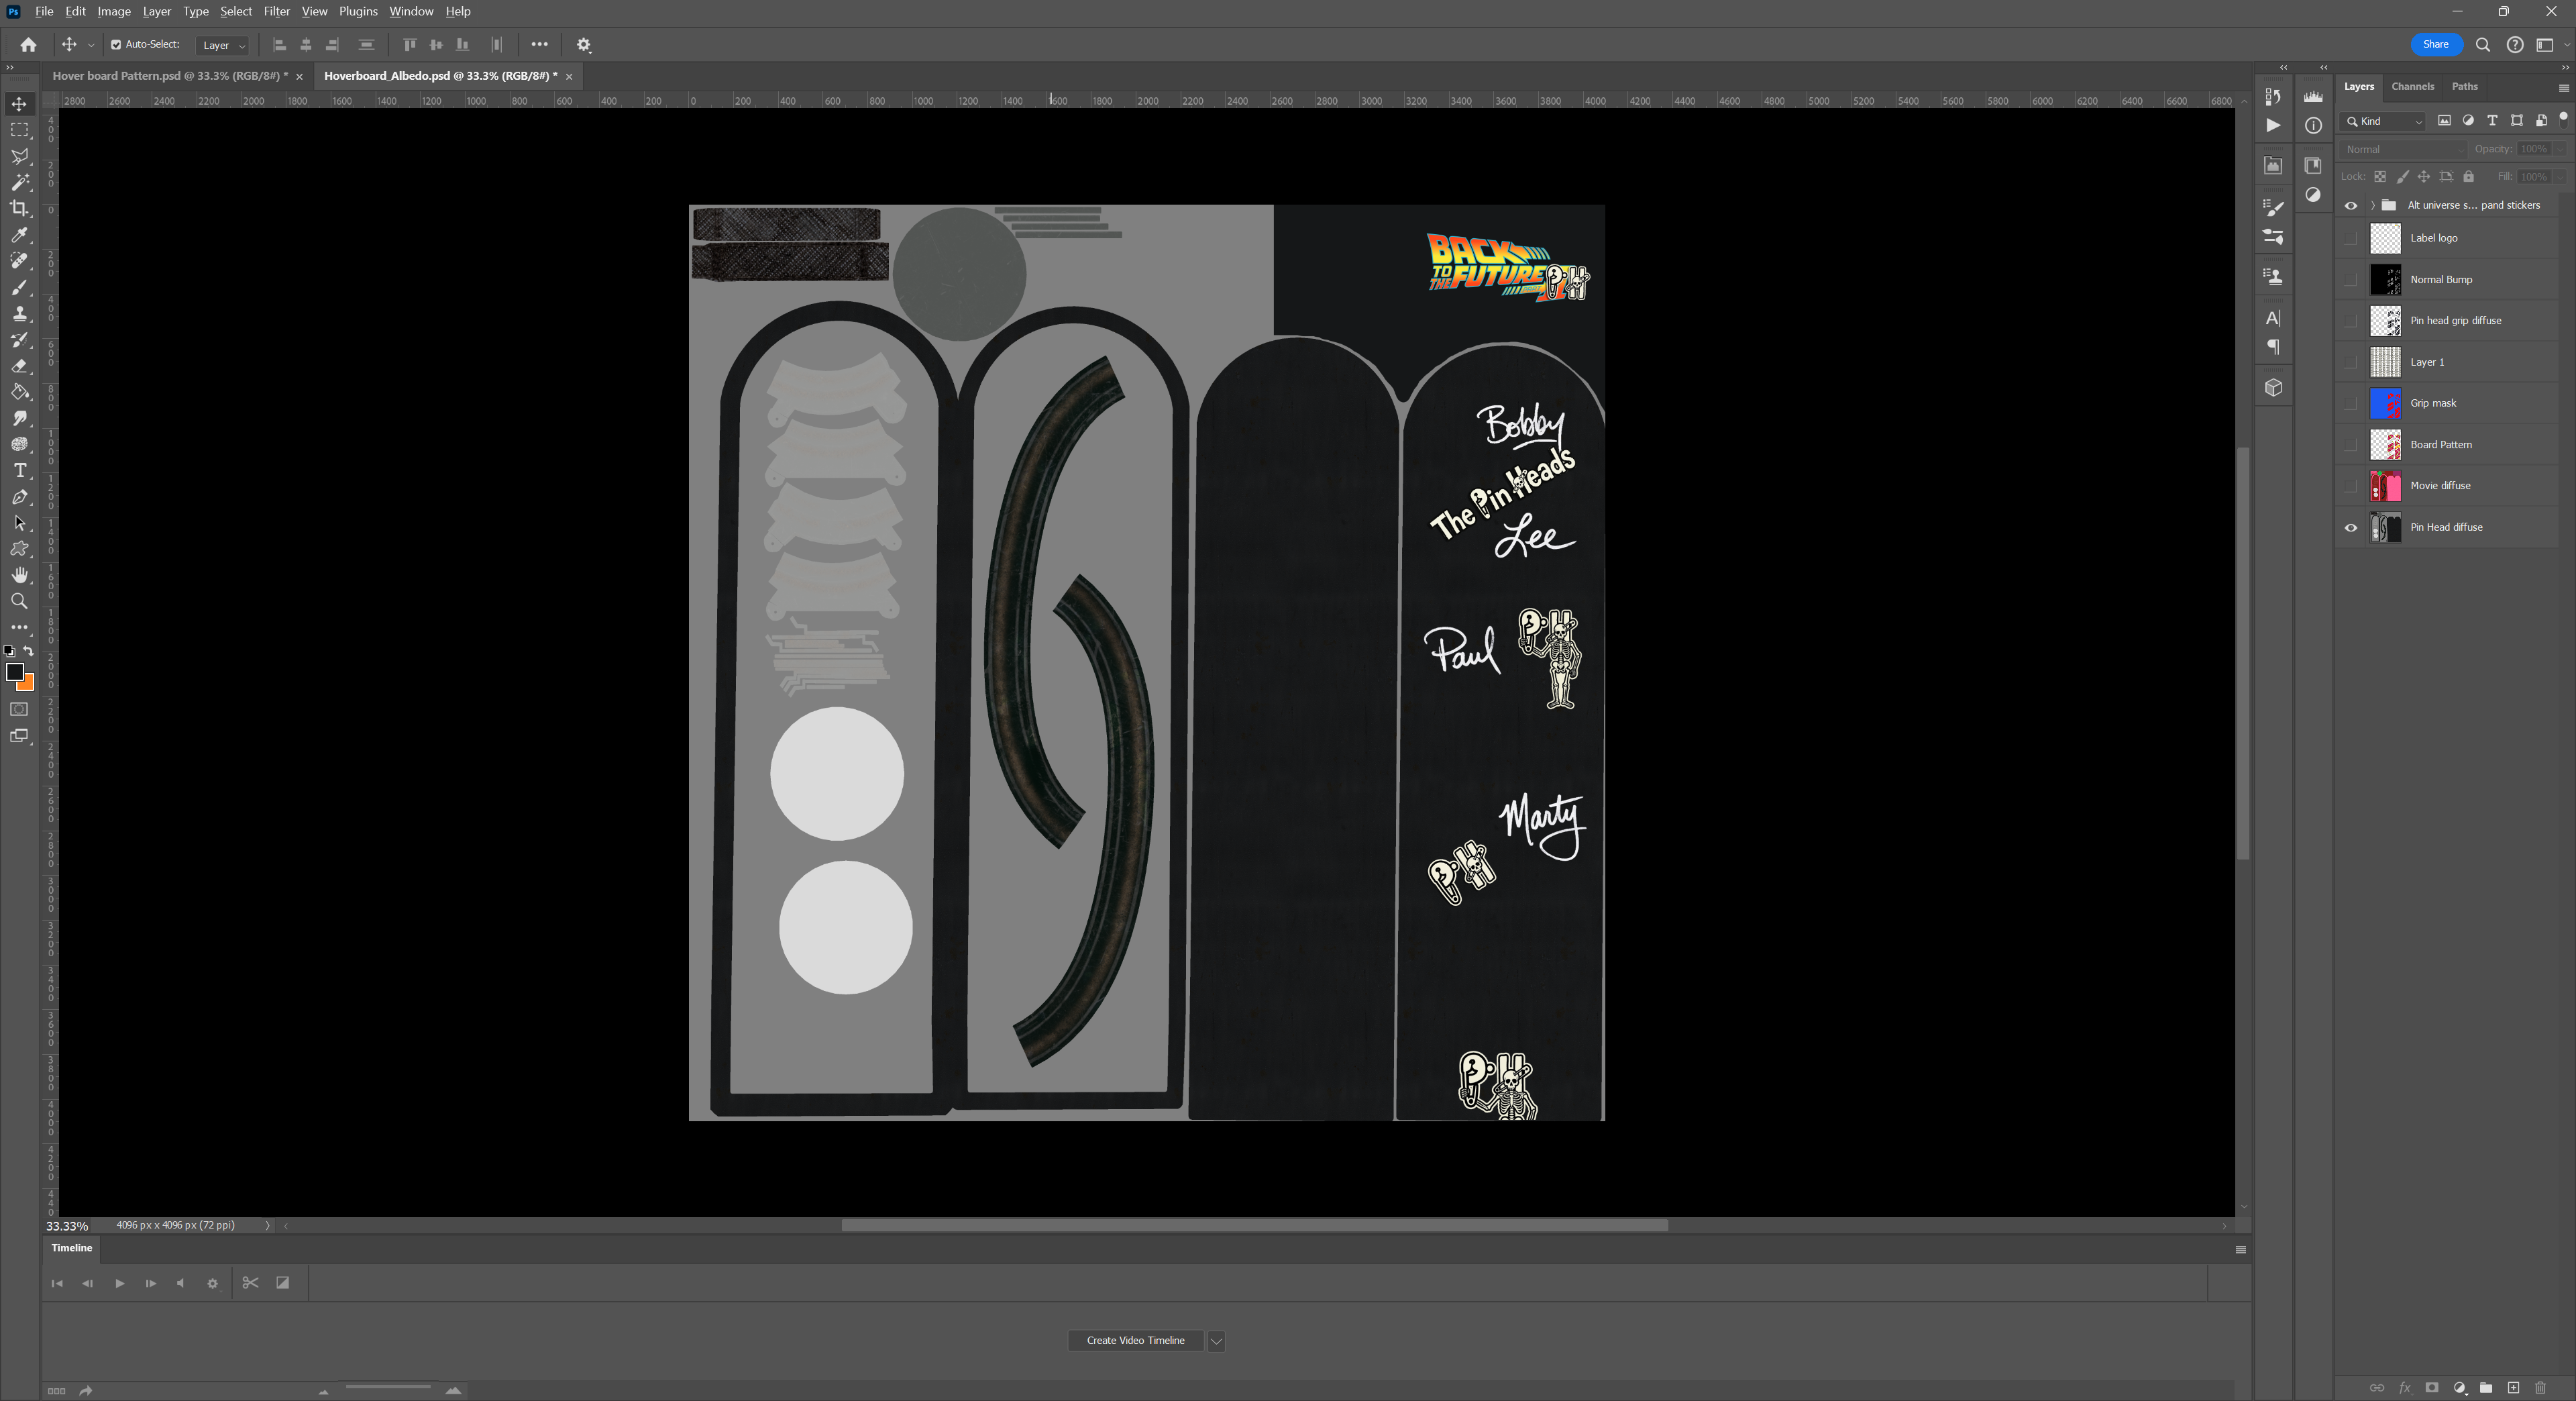
Using an exported UV template alongside high-resolution prop references, I recreated the iconic hoverboard pattern in Photoshop, matching details down to the specific grip tape graphics. While building the main pattern, I started brainstorming alternate texture variants:
-
What if the board was signed by Marty?
-
What if this board was a gift from Doc in an alternate timeline where Marty and his band, The Pinheads, actually made it big?
The "Band Merch" Variant
I created a primary Photoshop document that would only include custom decals and graphics; this included AI-generated signatures, band logo and stickers. The logo and stickers were a happy accident after the AI created it as part of a signed band flyer I asked it to make. I then added the logo into the boards grip detail using Materialize to create a normal map based off the final Albedo before combining it with the existing Quixel normal map. This resulted in a fitting and authentic detail.
Quixel Material Adjustments: I duplicated and tweaked the Quixel project to produce a secondary set of textures (e.g., swapping out the pink foam and red plastics for components for a more metal band darker look.
Reference & Modeling Process


bottom of page